Magnetic Track Lighting Installation Guide for Architects and Contractors

Magnetic track lighting has become the preferred choice for architects and interior designers seeking minimalist, flexible illumination. The tool-free magnetic attachment system allows luminaires to be added, removed, or repositioned instantly — making it ideal for spaces where lighting needs evolve over time. This guide provides a comprehensive installation reference for architects, contractors, and electricians.
System Overview
A magnetic track lighting system consists of three core components:
- Track rail — Aluminum profile with embedded magnets and conductive strips, available in 1m, 1.5m, 2m, and 3m lengths
- Power supply — LED driver converting AC mains to low-voltage DC (24V or 48V)
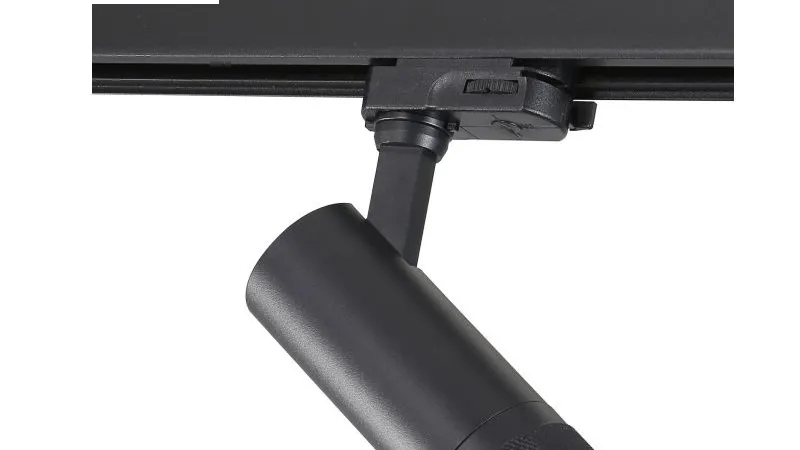
- Luminaires — Magnetic-attachment fixtures including spotlights, linear modules, pendants, and ball lights
Explore our full range of magnetic track lighting systems for 24V and 48V options.
Pre-Installation Planning
Electrical Requirements
- Input voltage: 100-240V AC, 50/60Hz (universal input for global compatibility)
- Driver placement: Must be accessible for maintenance; typically installed in ceiling void, junction box, or remote location
- Wire gauge: 1.5mm² (16 AWG) minimum for runs up to 10m; 2.5mm² (14 AWG) for longer runs
- Circuit protection: Dedicated MCB (miniature circuit breaker) rated for the total load + 20% margin
Load Calculation
Calculate total fixture wattage and verify it does not exceed the power supply capacity:
- 24V systems: typically 80-100W per driver (supports 8-12 medium fixtures)
- 48V systems: typically 150-300W per driver (supports 15-30+ fixtures)
- Always maintain 20% headroom — never load a driver to 100% capacity
Track Layout Planning
Plan track runs considering:
- Ceiling structure (concrete slab, suspended ceiling, or drywall)
- Track length and joint positions (minimize joints for cleaner appearance)
- Fixture positions and beam coverage areas
- Power feed location (end-feed or center-feed configuration)
Mounting Methods
1. Recessed Installation (Flush-Mount)
Recessed installation provides the cleanest aesthetic, with the track sitting flush with the ceiling surface. This method requires ceiling modification.
Steps:
- Mark the track channel on the ceiling using a laser level for straight alignment
- Cut the ceiling channel using a router or oscillating multi-tool — width must match track profile exactly (typically 15-25mm for 48V, 5-15mm for 24V)
- Install mounting brackets at 600mm intervals along the channel
- Insert the track rail into the channel and secure with mounting screws
- Connect the power feed cable to the track's terminal block
- Apply finishing trim or plaster around the track edges for seamless integration
Key considerations:
- Verify ceiling depth is sufficient for track + wiring (minimum 40mm void required)
- For concrete ceilings, use a concrete saw with diamond blade — plan cuts carefully as they cannot be undone
- For suspended ceilings, cut the ceiling panel and reinforce the track mounting with additional support brackets
2. Surface-Mounted Installation
Surface mounting is the simplest and most versatile method, suitable for any ceiling type without modification.
Steps:
- Mark mounting hole positions on the ceiling at maximum 600mm intervals
- Drill holes and insert wall plugs (use appropriate anchors for ceiling material)
- Position the track rail and secure with mounting screws
- Install end caps on both ends of the track
- Connect the power feed cable to the track's terminal block
- Test continuity with a multimeter before connecting the driver
Key considerations:
- Use a laser level to ensure the track is perfectly straight — visible misalignment is unacceptable for surface-mounted installations
- For drywall ceilings, use toggle bolts or find ceiling joists for secure mounting
- Surface-mounted track is visible — choose black or white finish to match ceiling color
3. Suspended Installation (Pendant-Style)
Suspended mounting hangs the track from the ceiling using steel cables or rods, creating a floating lighting element. Popular in high-ceiling commercial spaces.
Steps:
- Install ceiling anchors rated for the total track + fixture weight (typically 5-15kg per meter)
- Cut suspension cables/rods to the desired drop length (standard: 200-500mm)
- Attach suspension fittings to the track at 600-1000mm intervals
- Hang the track from the ceiling anchors and adjust cable lengths for level positioning
- Route the power feed cable through one of the suspension points or use a separate feed point
- Connect the driver and test the system
Key considerations:
- Verify ceiling structure can support the total suspended load
- Use adjustable cable grippers for fine-tuning track level after installation
- For very long suspended runs (>3m), add intermediate suspension points to prevent sagging
Electrical Connection
Power Feed Installation
The power feed connects the AC mains to the track's DC conductive strips via the LED driver:
- Isolate power at the circuit breaker
- Connect the driver input to the AC mains (L, N, PE) following local electrical code
- Connect the driver output (DC+, DC-) to the track's terminal block — observe polarity
- For center-feed configuration, connect the driver to the midpoint of the track run
- For end-feed configuration, connect the driver to one end of the track
- Secure all connections and insulate exposed terminals
Multiple Driver Configuration
For long track runs exceeding a single driver's capacity, use multiple drivers with isolated track sections:
- Each driver powers a separate track section (do not parallel drivers on the same track)
- Use insulated connectors between sections to prevent cross-current
- Balance the load evenly across drivers for optimal efficiency
Fixture Installation
The magnetic attachment system makes fixture installation straightforward:
- Align the fixture's magnetic adapter with the track rail
- Press the fixture onto the track — the magnets will hold it in place
- Rotate the fixture 90° to lock the electrical connection (listen for a click)
- Adjust the fixture angle and position as needed — no tools required
Safety note: Although the track operates at safe low voltage (24V/48V SELV), always isolate power before adding or removing fixtures if the track ends are exposed.
Troubleshooting Common Issues
| Issue | Possible Cause | Solution |
|---|---|---|
| No power to track | Driver not connected or faulty | Check driver input/output voltage with multimeter |
| Fixture flickering | Poor magnetic contact or dirty track | Clean track surface; reseat fixture firmly |
| Voltage drop on long runs | Run too long for wire gauge | Add mid-run power feed or use thicker wire |
| Driver overheating | Overloaded or poor ventilation | Reduce load; ensure driver has adequate airflow |
| Uneven brightness | Voltage drop or mixed fixture types | Verify uniform fixture wattage; check voltage at far end |
Installation Best Practices
- Always use a laser level — even 2mm deviation over 3m is visually noticeable
- Test before final mounting — connect driver and test all fixtures before securing track permanently
- Document the layout — photograph the installation with measurements for future maintenance
- Label circuits — if multiple drivers are used, label each circuit at the distribution board
- Keep spare fixtures — magnetic systems make it easy to swap fixtures; keep 1-2 spares for quick replacement
Recommended Products for Installation
For professional magnetic track installations, we recommend:
- 48V DALI magnetic system — 24V/48V DALI dimmable magnetic linear track light for commercial projects
- 24V smart system — 24V magnetic track system with Zigbee/Bluetooth for residential and light commercial
- Surface-mounted track — Available in black and white finish for visible installations
Conclusion
Magnetic track lighting installation requires careful planning of electrical requirements, track layout, and mounting method. By following this guide — from load calculation through fixture installation and troubleshooting — architects and contractors can deliver clean, professional installations that leverage the full flexibility of magnetic track systems.
For technical support, product specifications, or project consultation, contact our engineering team.